Disaster recovery
The section describes how to perform disaster recovery testing using AutoBackup.
Supported resources
- AWS RDS instances (copying a snapshot to the restore region)
- AWS RDS clusters (copying a snapshot to the restore region)
- AWS EC2 (creating an AMI in the restore region)
- Azure VM (creating a DR resource group, creating disks from Recovery Point and deploying the template)
Cleanup after Disaster Recovery
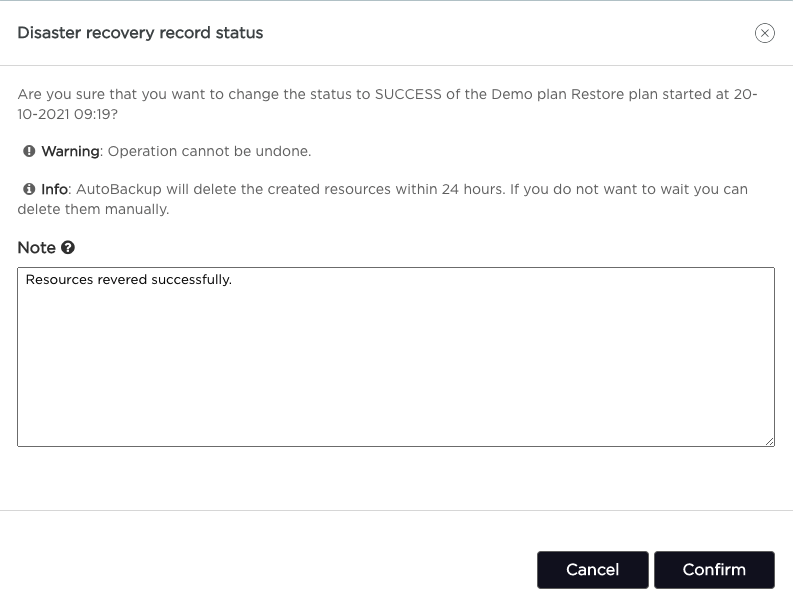
AutoBackup will delete the created resources within 24 hours. If you do not want to wait you can delete them manually. For Azure VM, AutoBackup will remove the whole resource group created for Disaster Recovery testing. For AWS resources, AutoBackup will remove the copied snapshot to the Disaster Recovery region (the snapshots created during backup event will be untouched). Remember to remove created CloudFormation stacks manually.
Add a new template
- Choose "Disaster Recovery" from the navigation bar.
- Choose "Templates" tab and click "Create new" button.
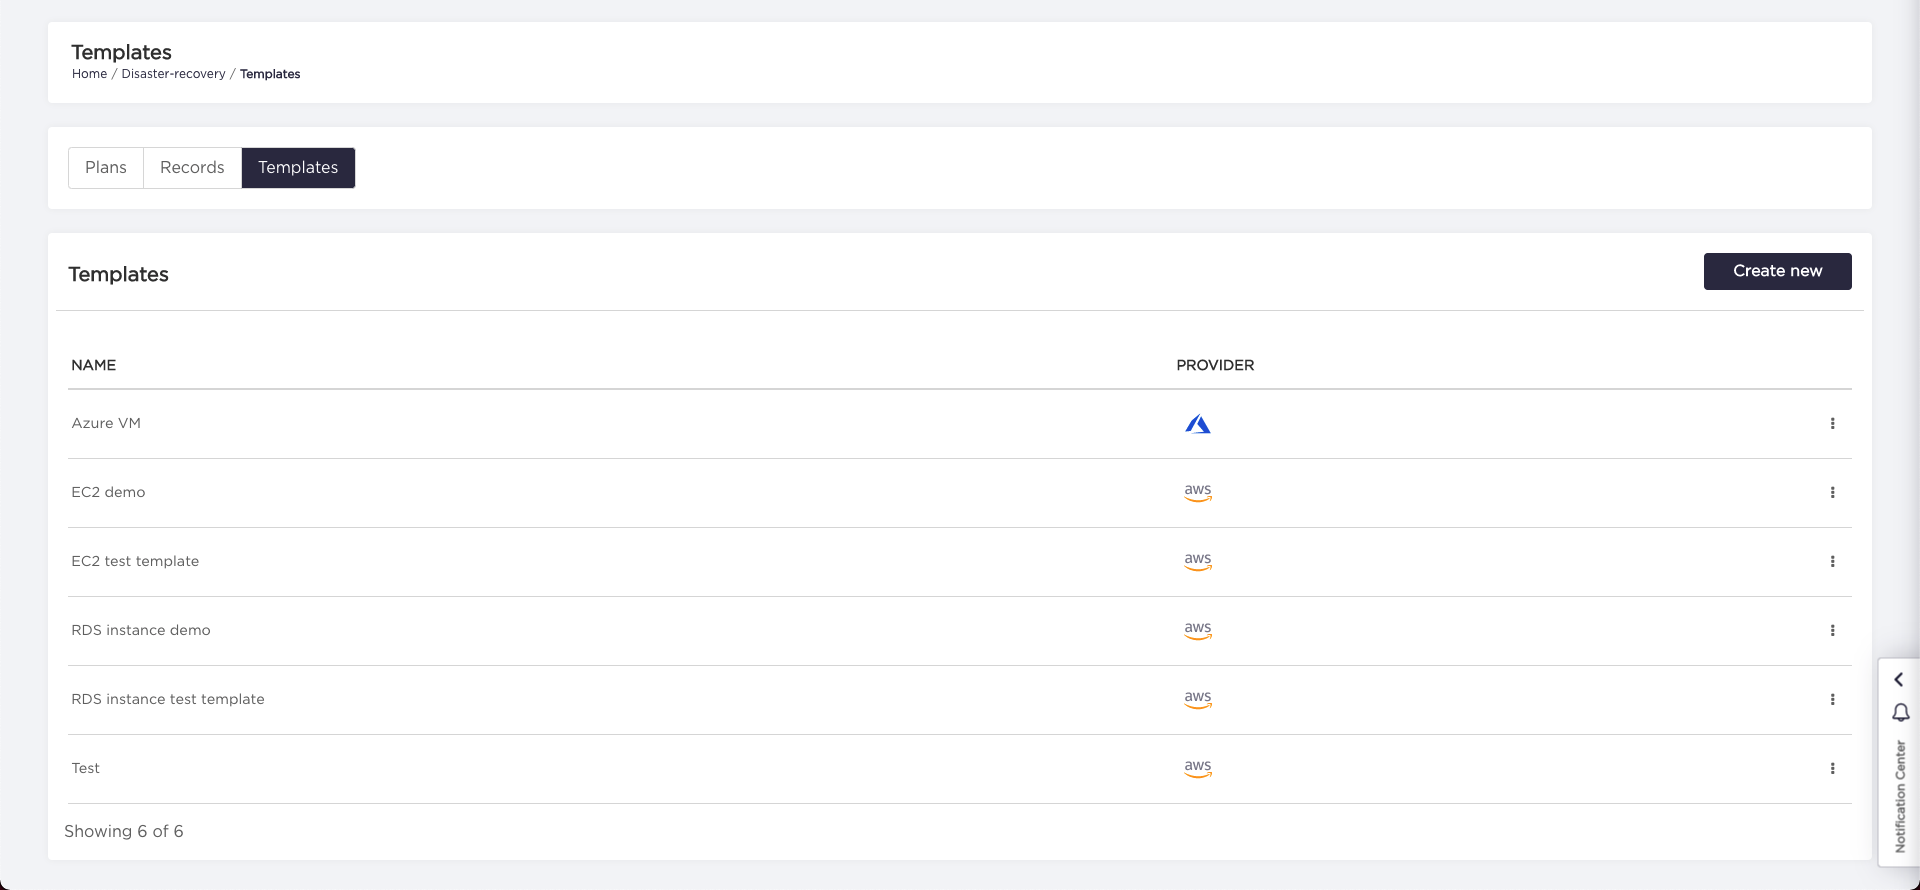
- Provide the name of the template and upload the template file (you can download example templates and adjust them for your use case)
by clicking "Choose file" button.
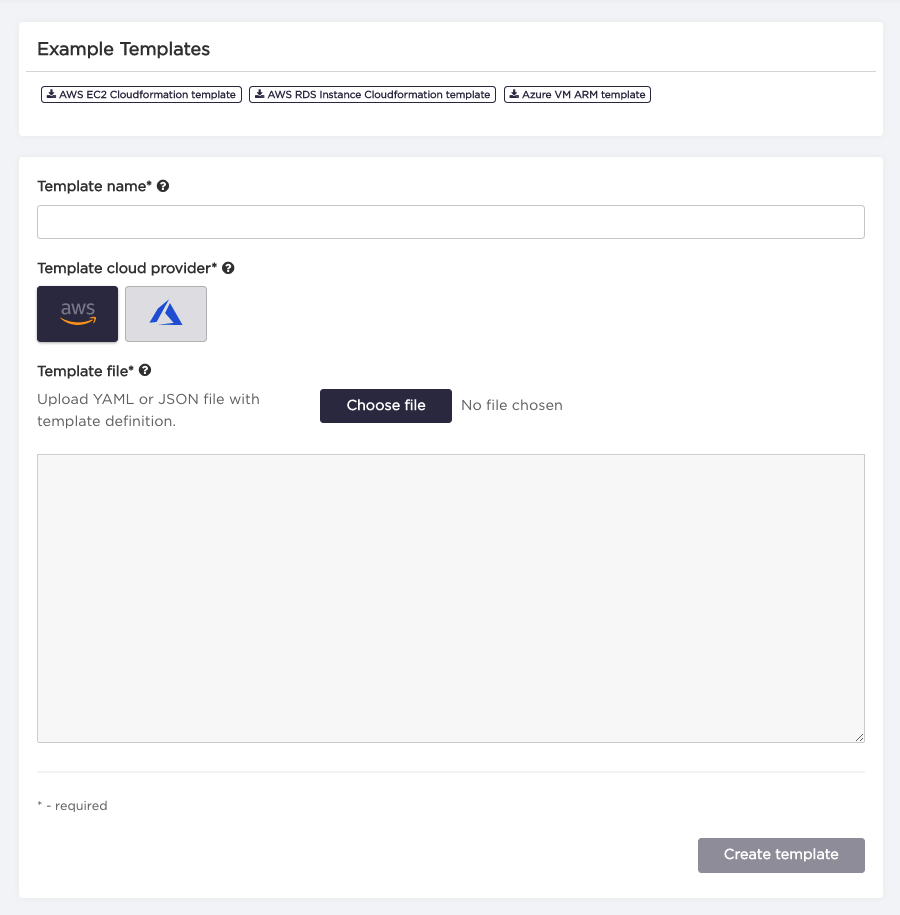
- Click "Create template" button to store template in the AutoBackup (AutoBackup will validate the correctness of the provided template).
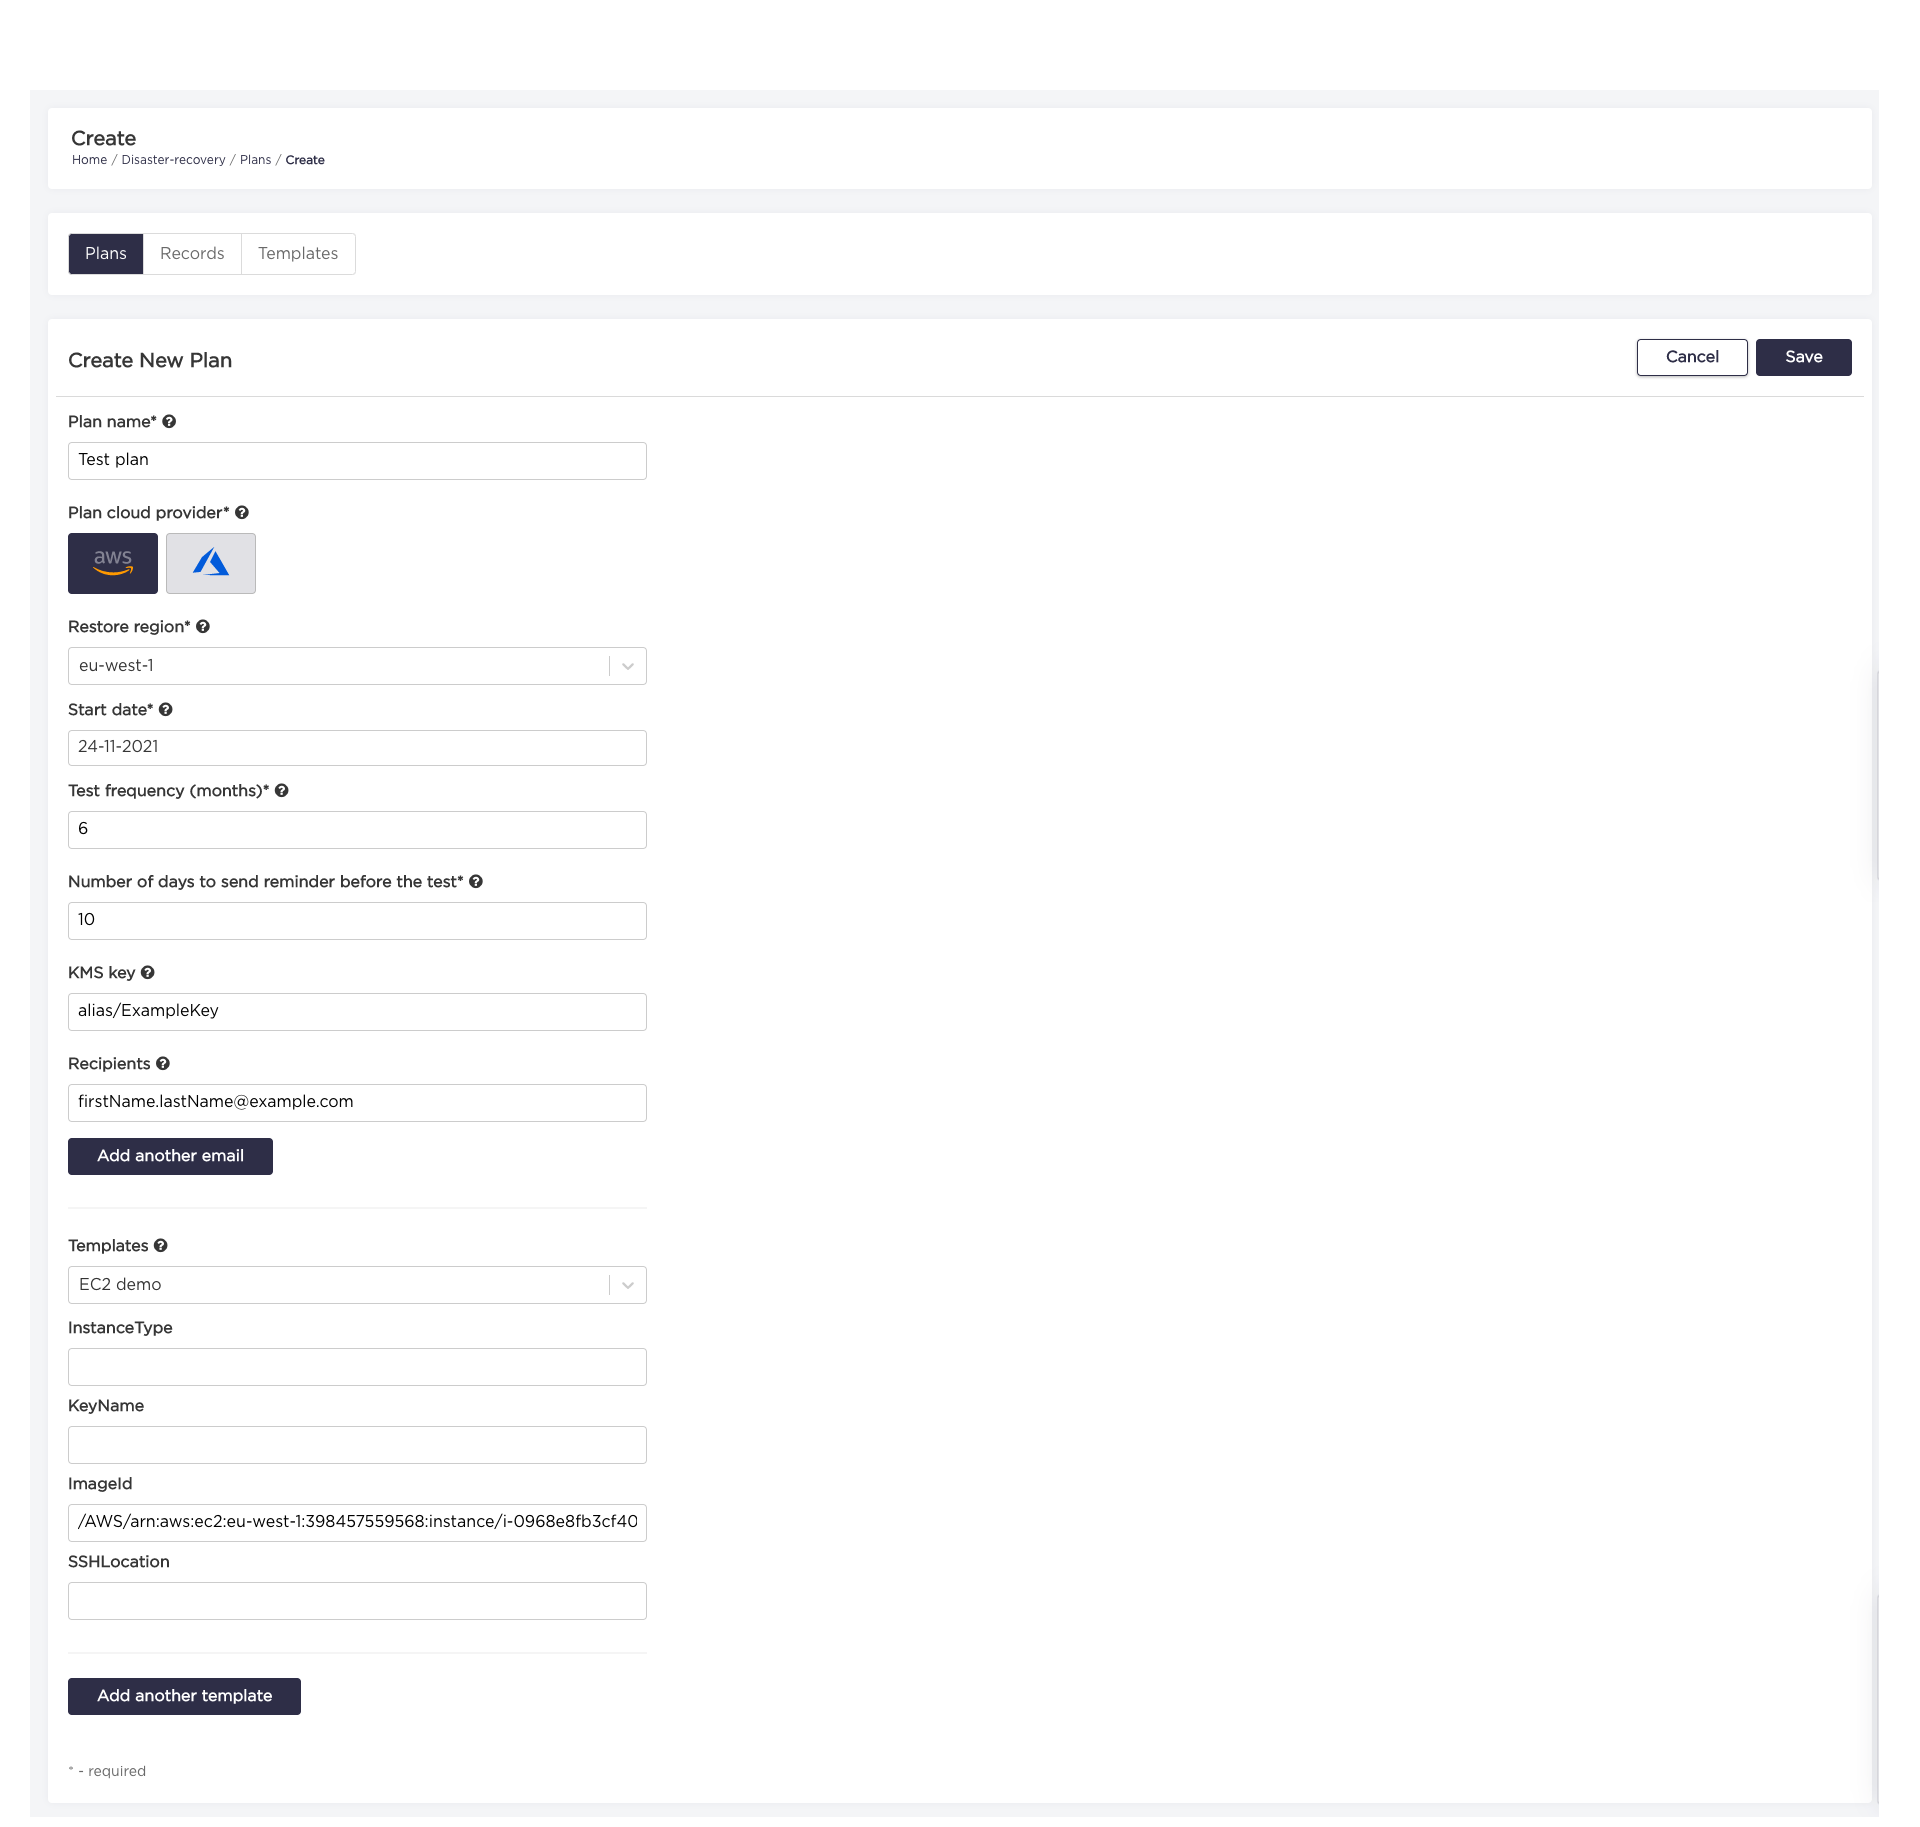
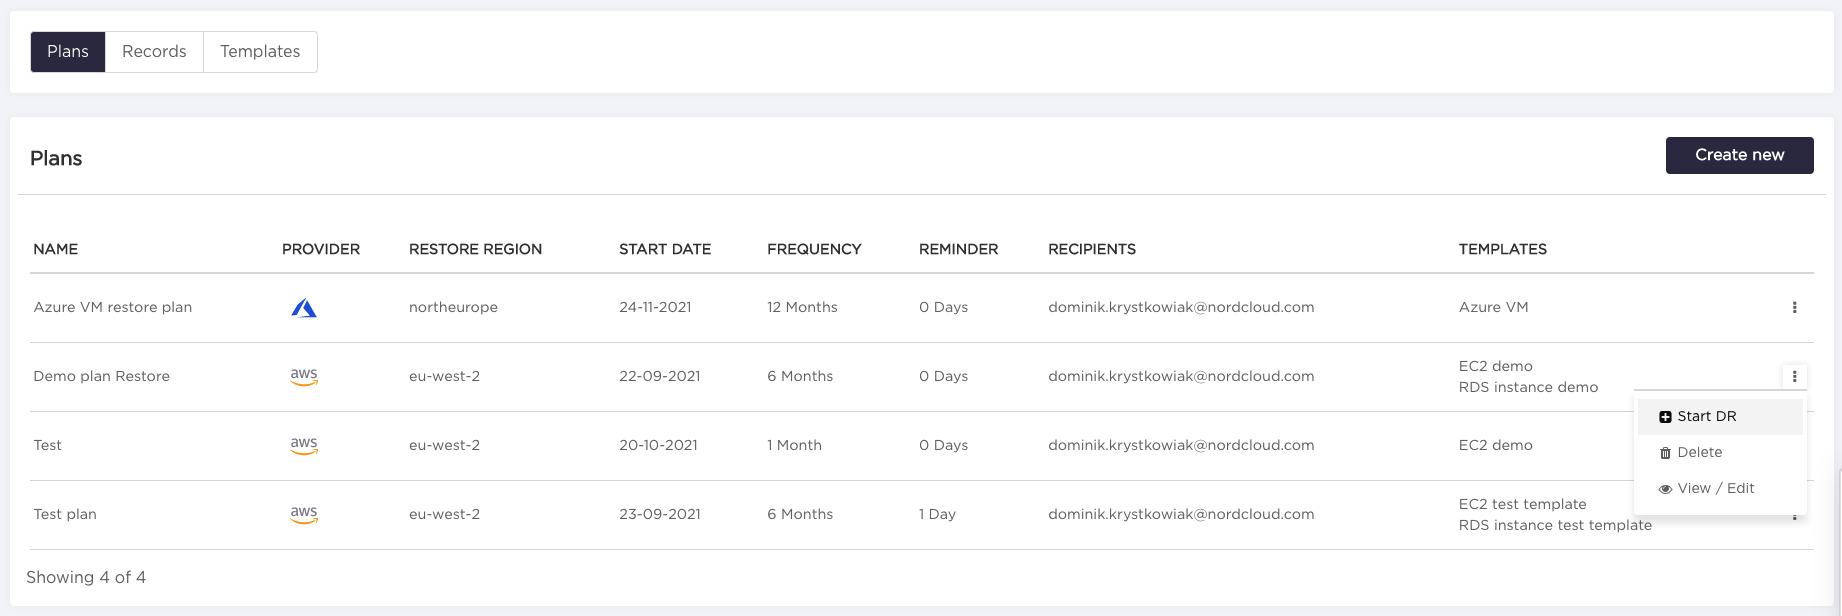
Add a new plan
- Choose "Disaster Recovery" from the navigation bar.
- Choose "Plans" tab and click "Create new" button.

- Enter all required fields to the plan form.
| Property | Required | Description |
|---|---|---|
| Plan name | yes | Custom name of plan. |
| Plan cloud provider | yes | Determines available regions, templates and resources to restore. |
| Restore region | yes | Determines region where resources should be recovered. |
| Start date | yes | Determines testing plan starting date (based on this field next testing dates will be calculated). |
| Test frequency (in months) | yes | Determines frequency of testing. |
| Number of days to send reminder before the test | yes | Determines how many days before next test date notifications must be sent. |
| KMS key | no | KMS key is used by AutoBackup to copy encrypted AWS snapshots to restore region. Following formats are correct: key ID (for example, key/1234abcd-12ab-34cd-56ef-1234567890ab), key alias (for example, alias/ExampleAlias), key ARN (for example, arn:aws:kms:us-east-1:012345678910:key/abcd1234-a123-456a-a12b-a123b4cd56ef). |
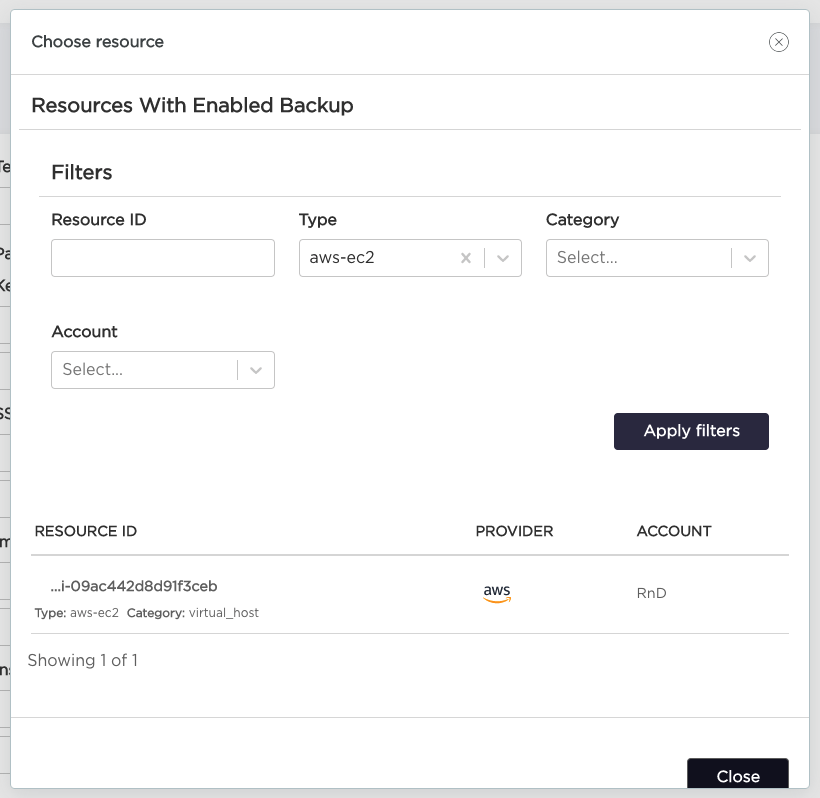
| Templates | yes | List of templates attached to the plan (which templates should be tested in plan). |
| Recipients | yes | Determines who should be notified about upcoming test date. |
- Click "Save" button after you've finished providing values.
Start Disaster Recovery Testing
- Choose "Disaster Recovery" from the navigation bar.
- Choose "Plans" tab and click on "three dots" on the right side of the template and select "Start DR" option.
- Pick the recovery date from the calendar (AutoBackup chooses the snapshots created on or before this date).
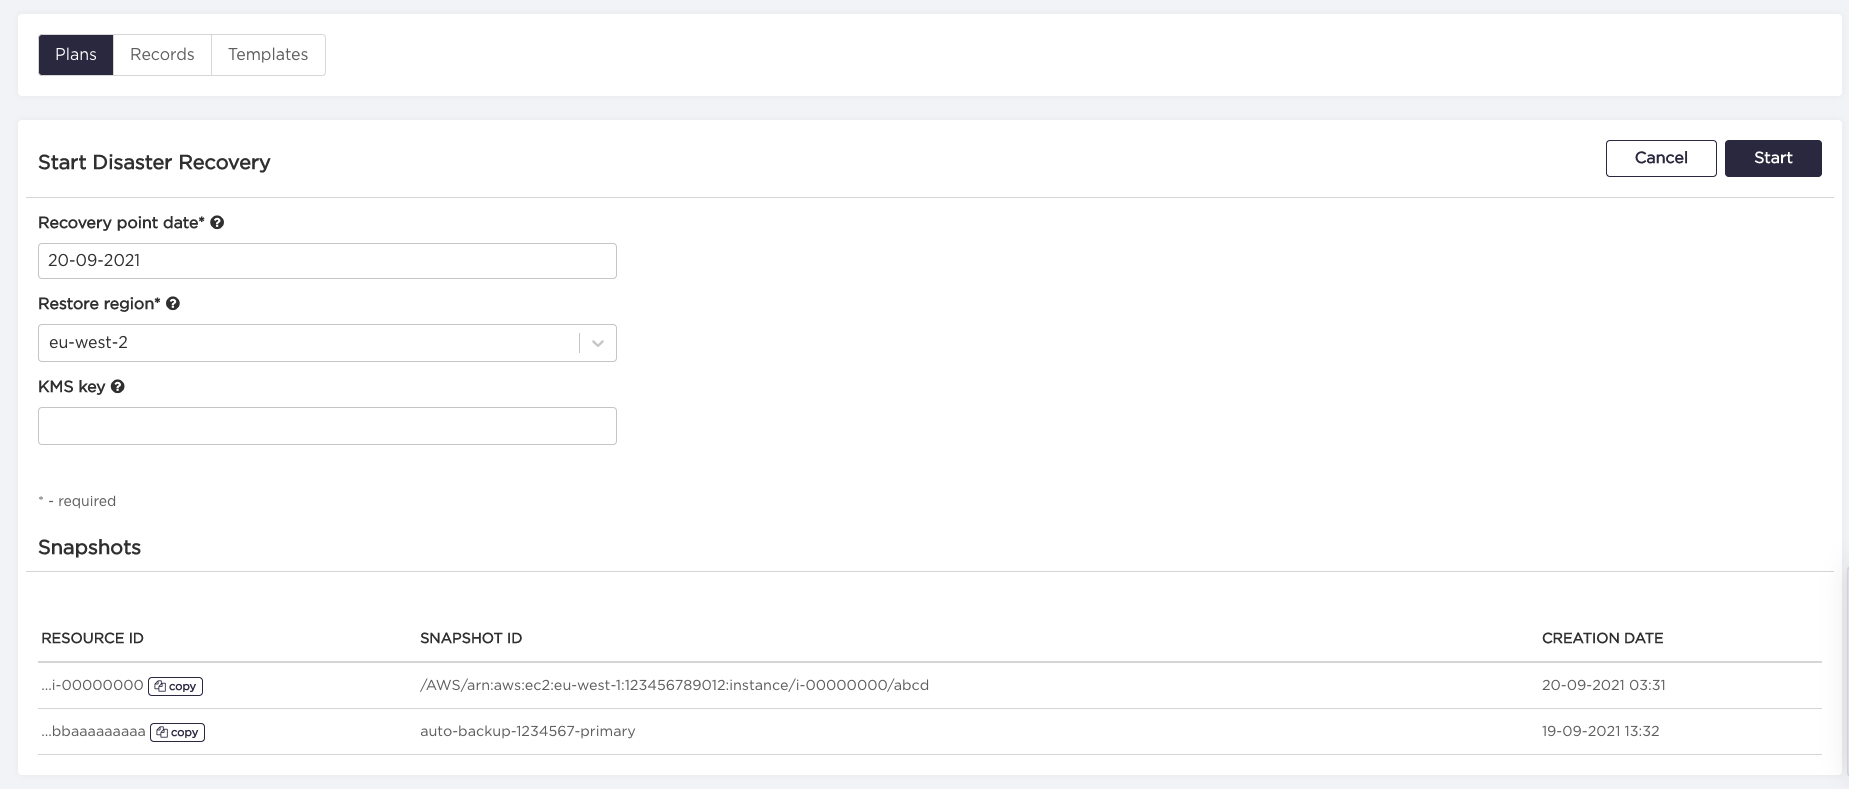
- Click "Start" button (you will be redirected to the "Records" tab, your DR record will be IN PROGRESS status).
To restore EC2, AutoBackup requires additional permissions - ec2:RegisterImage, ec2:DeregisterImage and ec2:CopyImage.
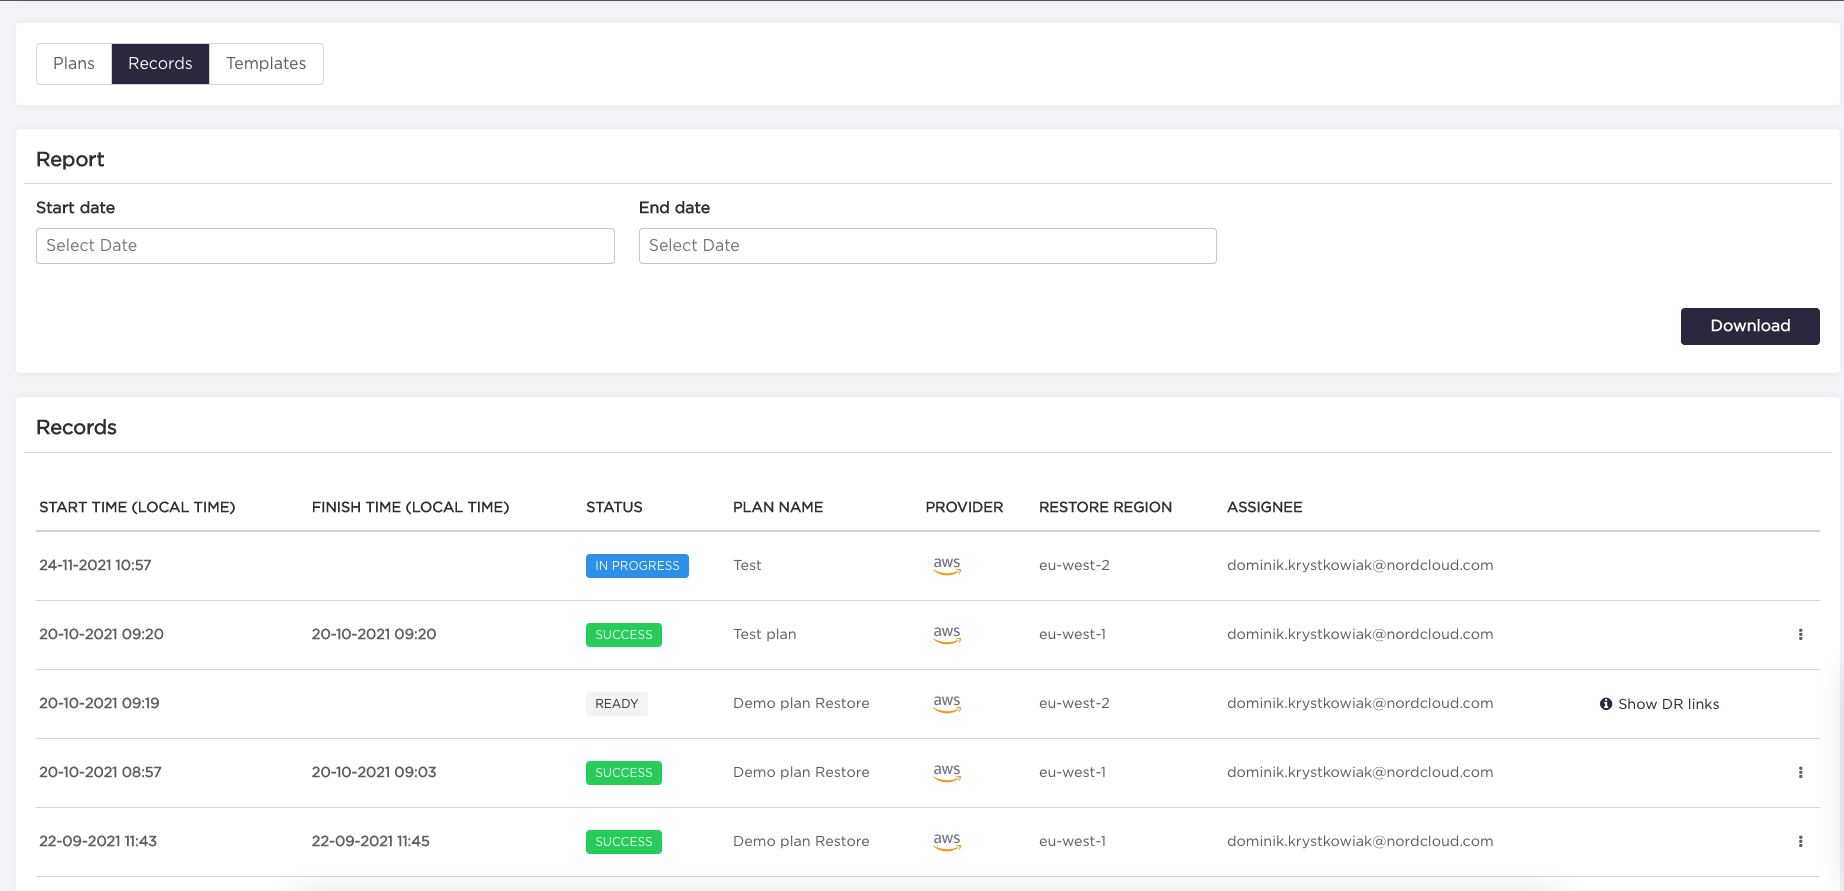 5. Wait for the status to change to READY (the copying process may take some time) and click "Show DR links" button.
- Click all the generated links and use provider's creator to restore resources.
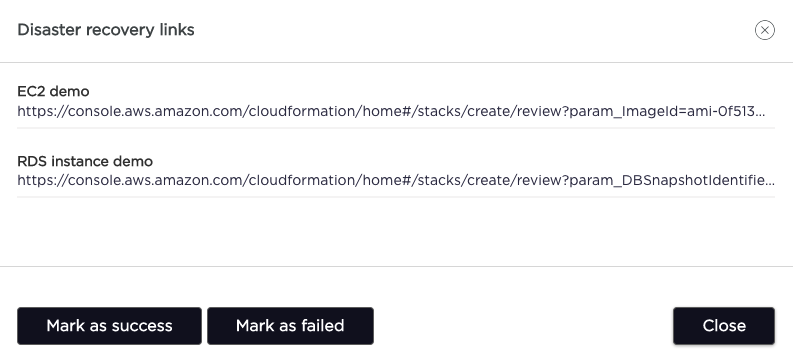
- Back to the AutoBackup ("Records" tab) and mark the testing event as success or failed.
- Click "Confirm" button. Remember that this operation cannot be undone (you could also add some comments about DR in the "Note" field).
- Remove created stacks when the DR testing has been finished (AutoBackup cleanups copied snapshot once per day).
Downloading audit logs
- Choose "Disaster Recovery" from the navigation bar.
- Choose "Records" tab.
- Pick "Start date" and "End date" from calendar.
- Click "Download" button to fetch the report.
